
Ship From Your IDE Without Living in Git: Agentia’s Cloud Commit Workflow

By Jonathan Wiesel
A lot of Salesforce work still starts in the org: a Flow in Setup, a field on Account, a permission tweak for a pilot. That isn’t a skill gap—it’s how many teams deliver. Git is powerful, but it isn’t everyone’s daily tool, and asking every builder to become a branching expert before they can ship is a steep tax.
Agentia’s Copado cloud delivery workflow is the middle ground. You keep working in familiar local developer tools—your IDE, compare, filters, dependency review—while Copado handles the Git side of the commit for you. You shift left (catch selection and dependency issues before promote), stay in one place (less jumping to the Copado UI), and still land changes on a governed user story.
If you already know Copado’s New Commit Experience (NCE), the shape will feel familiar. This walkthrough is the IDE version of that path. For the full local-vs-cloud map, see Workflows.
TL;DR
- Choose Copado cloud so the IDE shows the org-first commit lane—not the Git-clone lane.
- Set a user story as current; Agentia records context and starts tracking local filesystem changes.
- Open Commit metadata (cloud): pick from Local changes and the source org index, compare, add dependencies, commit—without managing a feature branch yourself.
- Follow the commit—and later the promotion—in Jobs and Recent jobs, still inside the IDE.
Why cloud delivery (and when you might switch later)
| You want | Cloud workflow | Local (Git) workflow |
|---|---|---|
| Commit without a local clone / branching ritual | Yes | No—you commit in Git first |
| Stay in the IDE for select → compare → commit → promote | Yes | Publish / Validate after local commits |
| Org-built and locally edited metadata on the same story | Yes | Prefer Git-tracked project files |
| Full control of every Git commit locally | Not required | Yes |
Cloud isn’t “anti-Git.” Copado still writes to the story’s feature branch in the pipeline repository. You just don’t have to drive that repository yourself. When you’re ready for a Git-first habit—or your team standardizes on local DX—you can switch the same workspace to Local repository and follow the Local Flow. Until then, cloud lets you use modern local tooling without making Git fluency a prerequisite.
1. Pick the delivery workflow
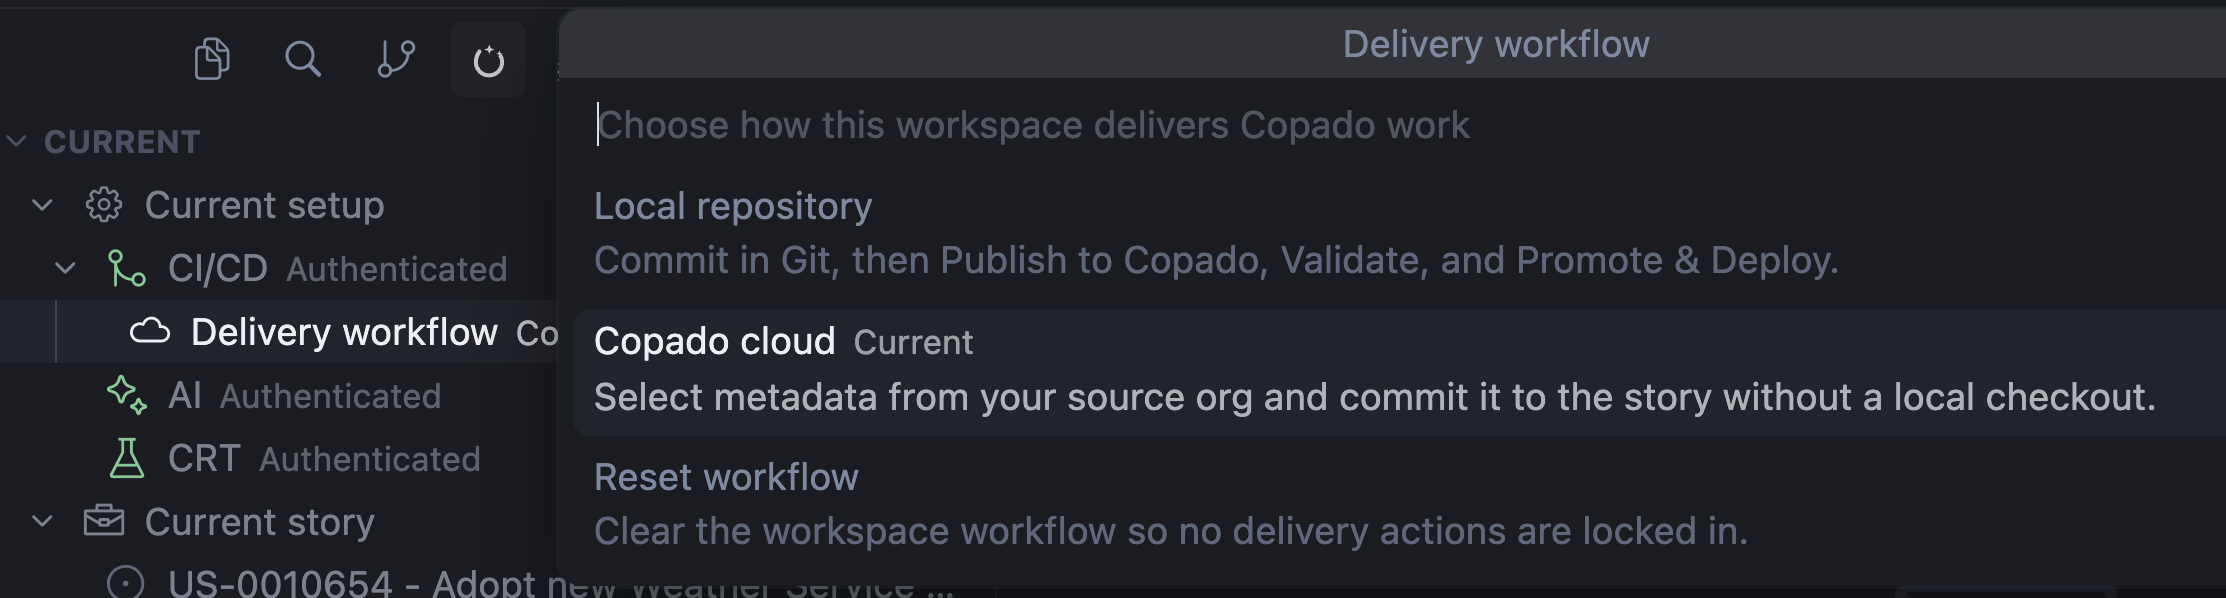
Agentia keeps one delivery lane per workspace: Local repository or Copado cloud. The IDE shows only the actions that match the lane you choose.
Use the Delivery workflow row under Current setup (or the Get Started walkthrough) and choose Copado cloud.
That choice matters: cloud actions—set current, commit metadata, promote—belong here; local Publish / Validate / Promote & Deploy stay on the other lane. Mixing them on the same story is blocked on purpose, so you always know which delivery style you’re in.
More detail on both lanes: Workflows.
2. Set the user story (and what happens under the hood)
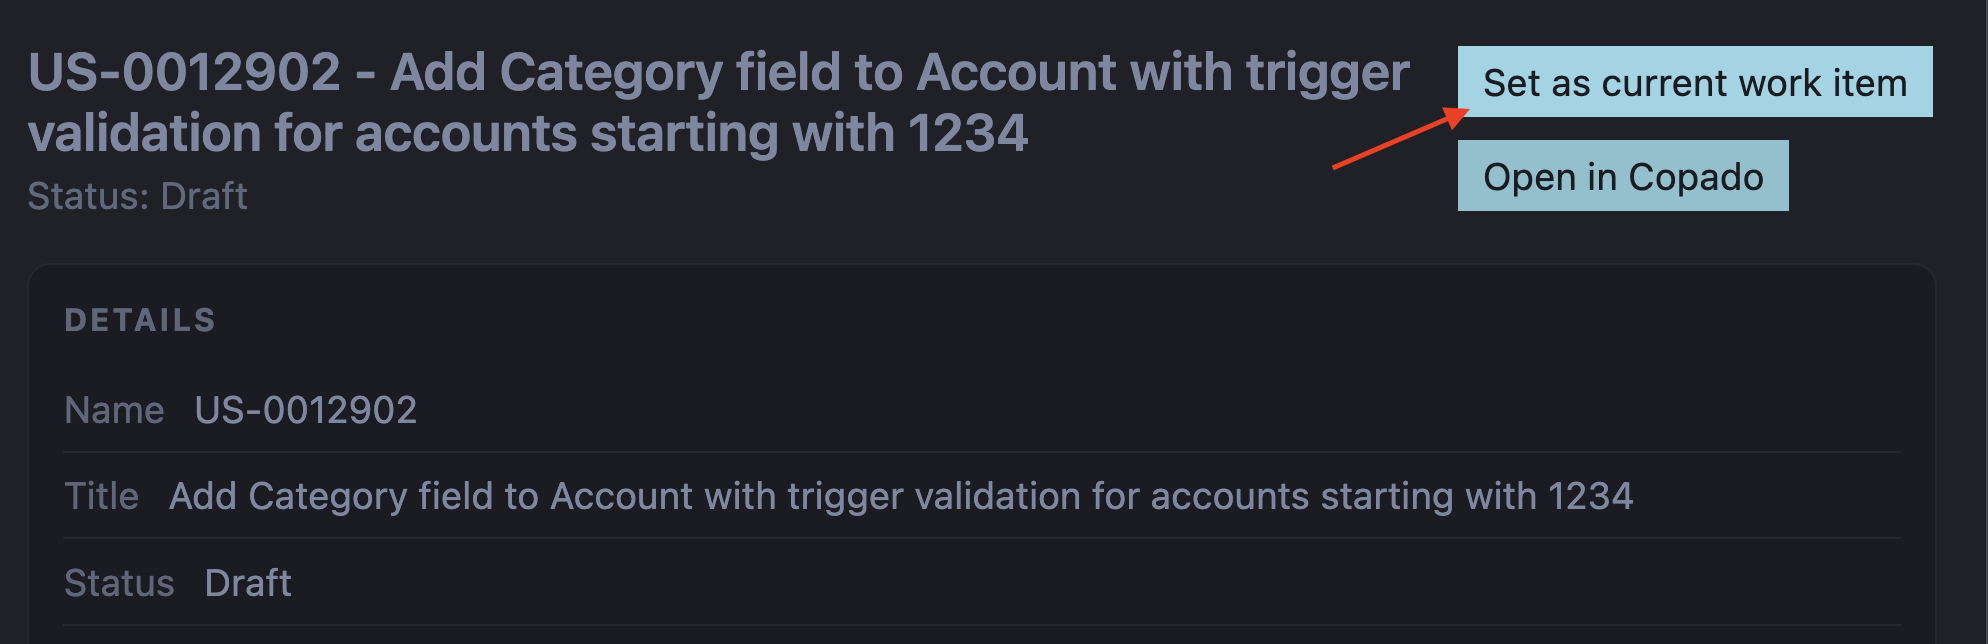
Find the story in Work / My Backlog, open it, and choose Set as current work item.
That looks like a simple “make this current,” but for cloud delivery it does more than remember an Id:
- Marks the story as the active cloud work item—no local Git checkout.
- Prepares the story for cloud commits against its pipeline and source org.
- Starts the local change baseline: from this moment, filesystem edits under the project can show up as Local changes in the commit panel (handy when you edit in the IDE and still commit through the cloud path).
- Lets the IDE load (or refresh) the cloud commit context—pipeline, source credential/org, destination, and permissions—before you select metadata.
If the context is missing or belongs to another story, opening the commit panel refreshes it automatically. You can also run Refresh cloud commit context from the Command Palette.
3. Commit with the NCE-style panel—in the IDE
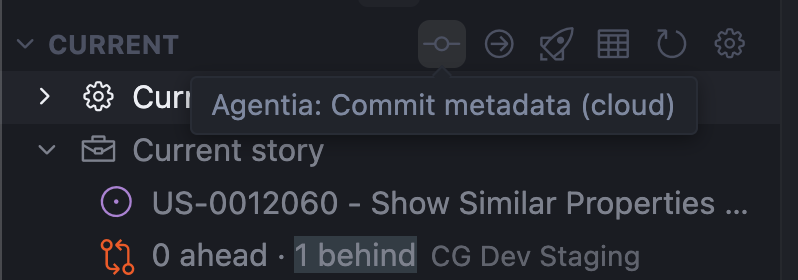
Open Commit metadata (cloud) from the Current title bar or the Command Palette.
This is where shift-left happens: you select, compare, and review dependencies before anything hits the pipeline—without leaving the editor for a separate commit UI.
Local changes and the org index
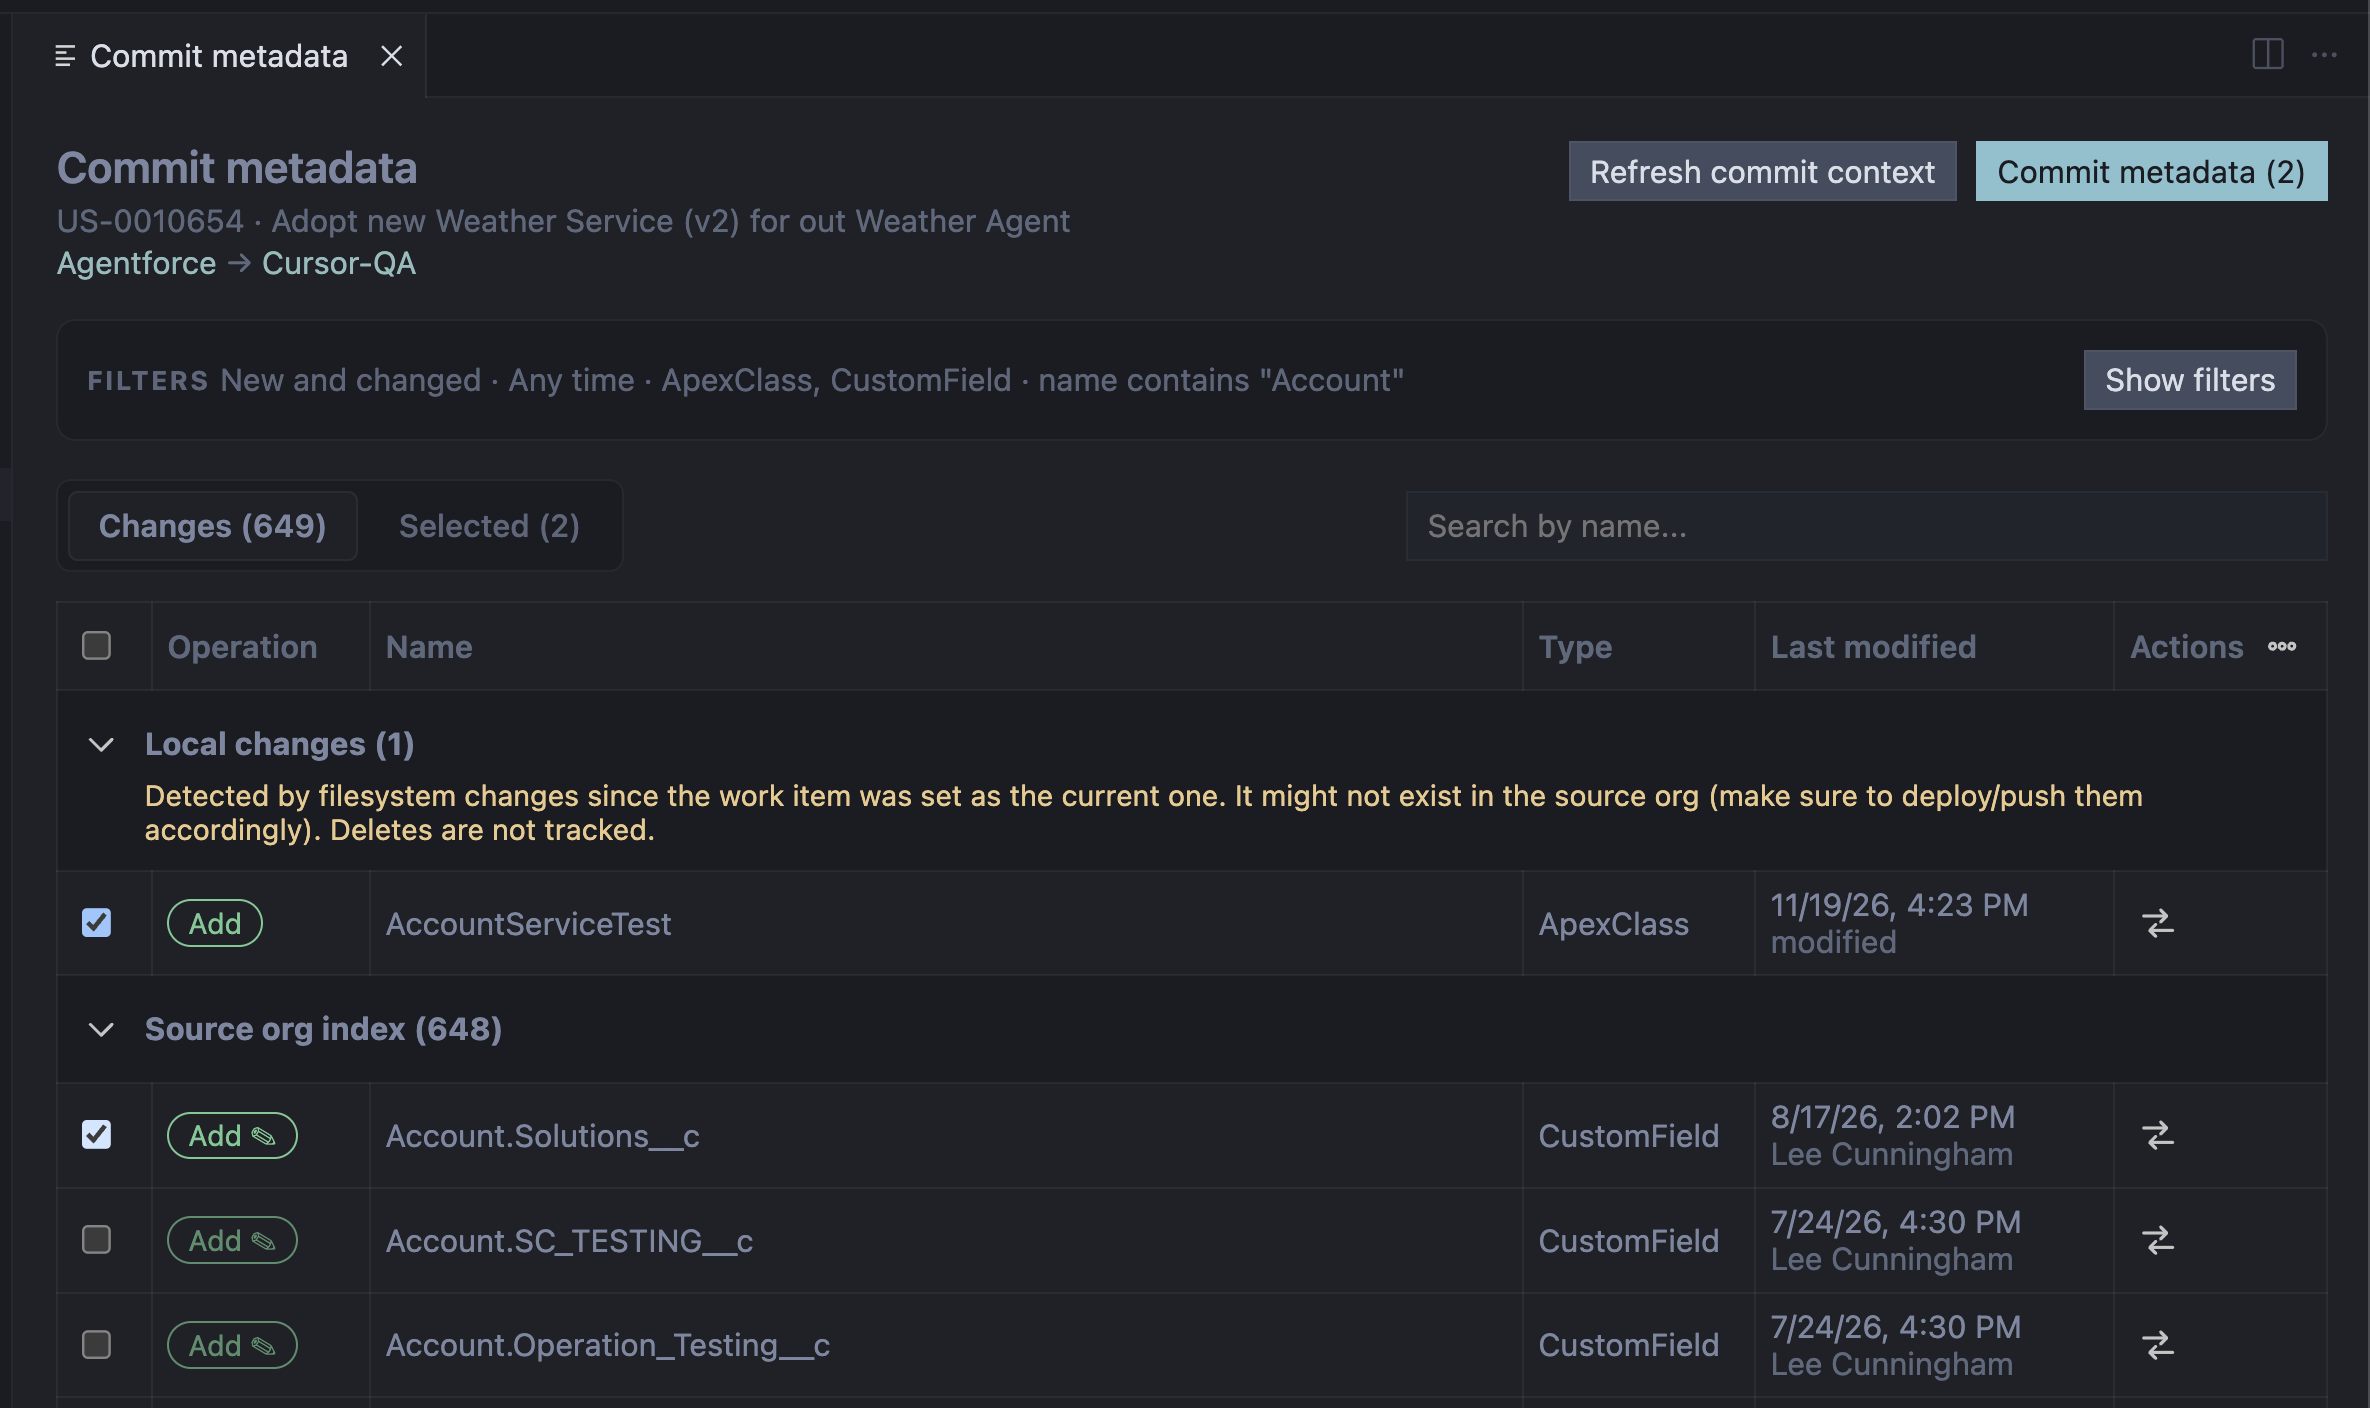
On the Changes tab you’ll see:
- Local changes — files changed in the workspace since you set the story as current (for New and changed). They’re preselected when detected. Compare uses the workspace file against the destination. Deletes aren’t tracked here; deploy or push into the source org first if a local file isn’t in the org yet.
- Source org index — recent org metadata, filterable by source (New and changed, Deleted when allowed, Previously committed), date, modified-by, type, name, and managed packages. Use Refresh metadata index when something you just built in the org isn’t listed yet.
Selecting the same type and name in both sections still yields one Selected entry. That’s the middle ground in practice: org work and IDE work, one commit selection.
Compare and operations
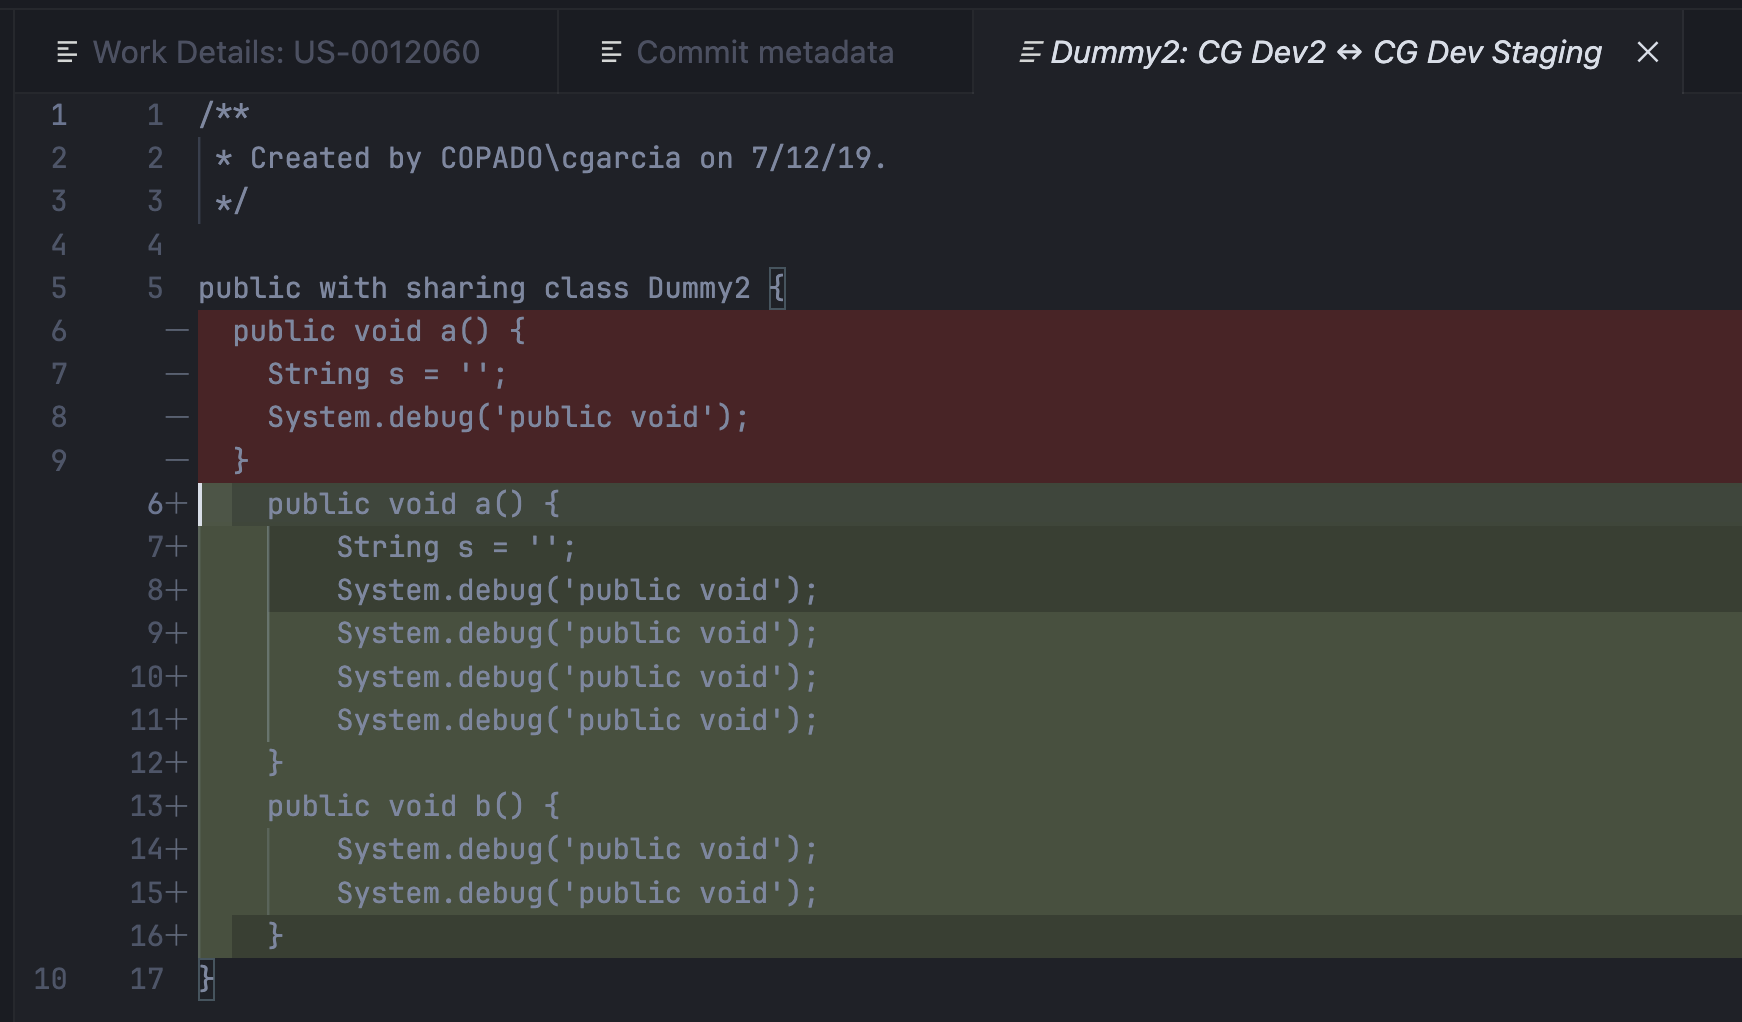
Use the Actions column to Compare source vs destination (or a session override via Compare against...). Change the Operation badge when needed—Add, Delete, Retrieve only or Full—according to type rules and pipeline policy. Expand bundles to pick individual files; partial file selection becomes a selective commit.
Review, dependencies, commit
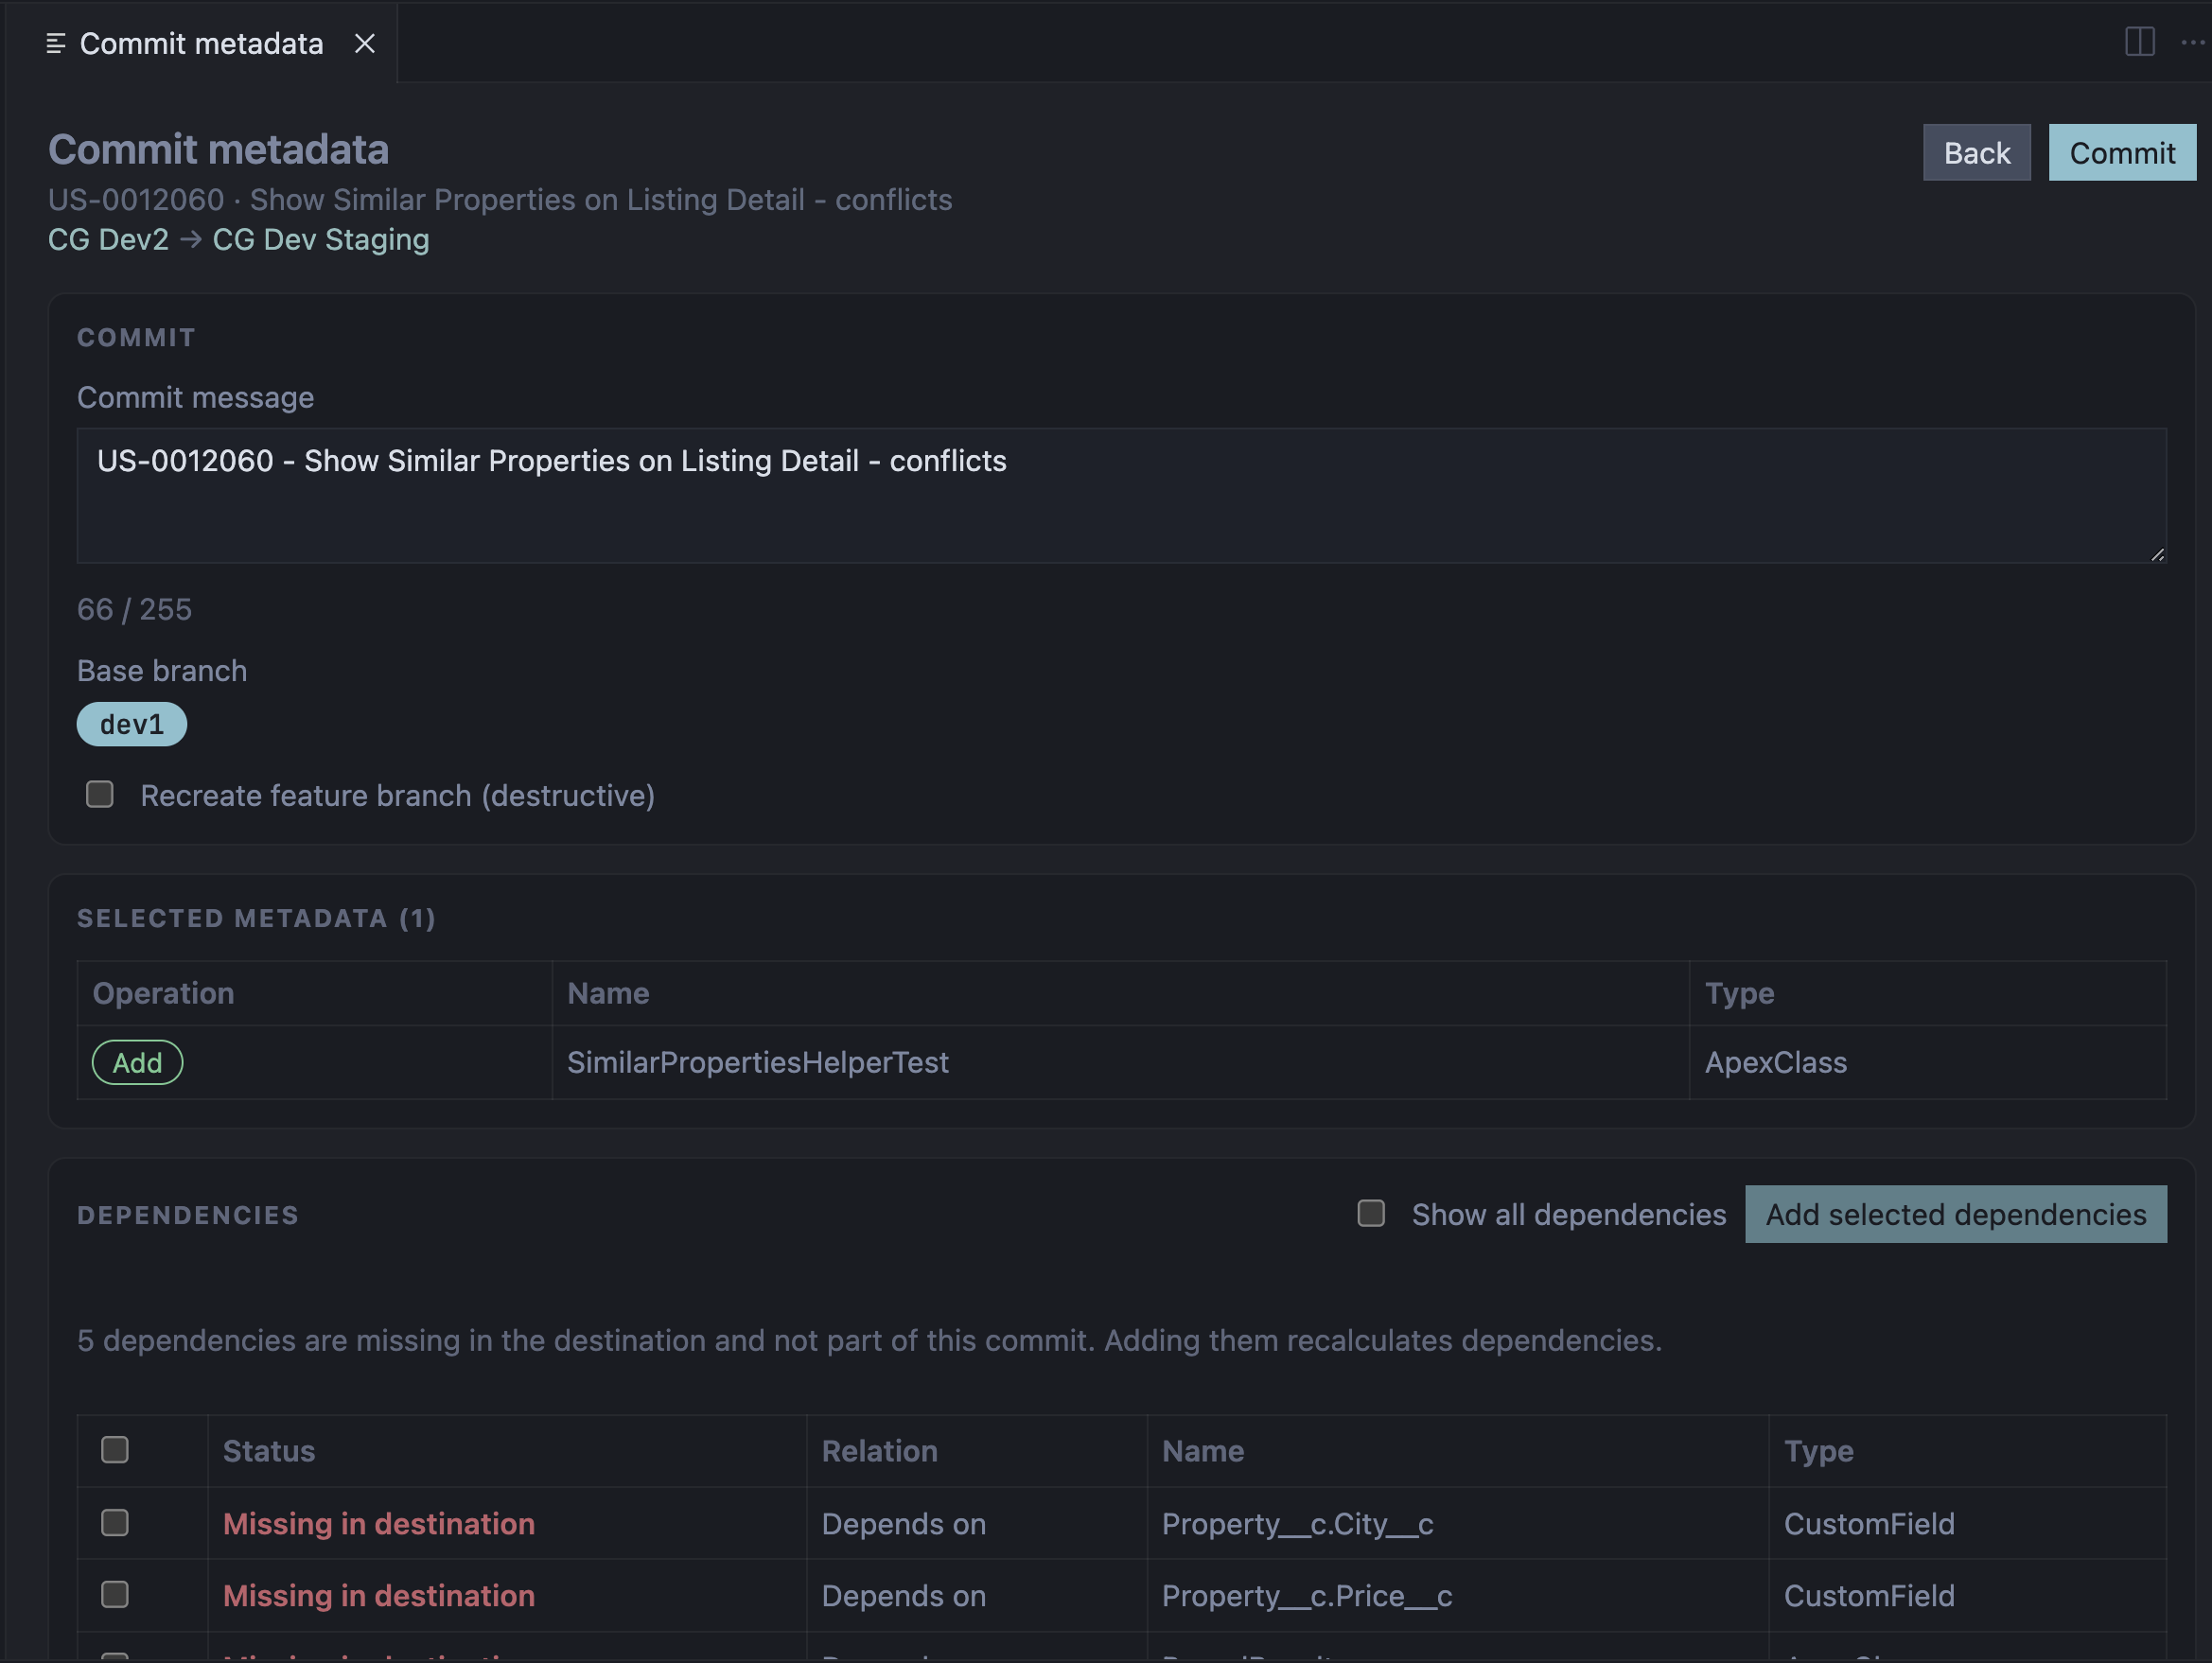
Commit metadata opens the review: prefilled message (<story number> - <story title>), base branch, selected metadata, and dependency analysis in both directions (what you depend on / what uses you). Differing dependencies are listed by default; turn on Show all dependencies for the wider graph. Adding a dependency re-runs the analysis.
Confirm with Commit. Behind the scenes, Copado still commits to the story’s feature branch—you didn’t need to clone, branch, or push to get there.
4. Monitor the commit—and the promotion the same way
A cloud commit starts a Copado job in the background. Don’t submit the same commit twice while it’s running.
Watch it here—still in the IDE, still no context switch to babysit progress elsewhere:
- Jobs view — filter, expand steps, open step logs in the editor.
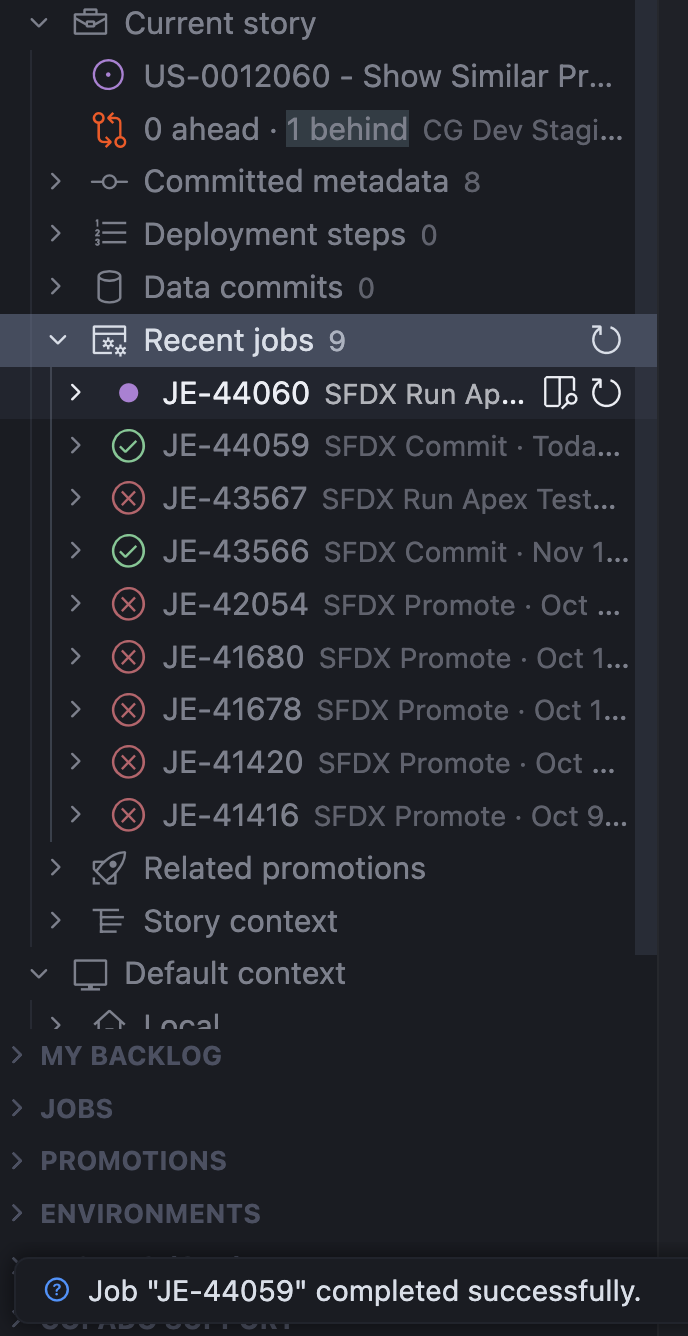
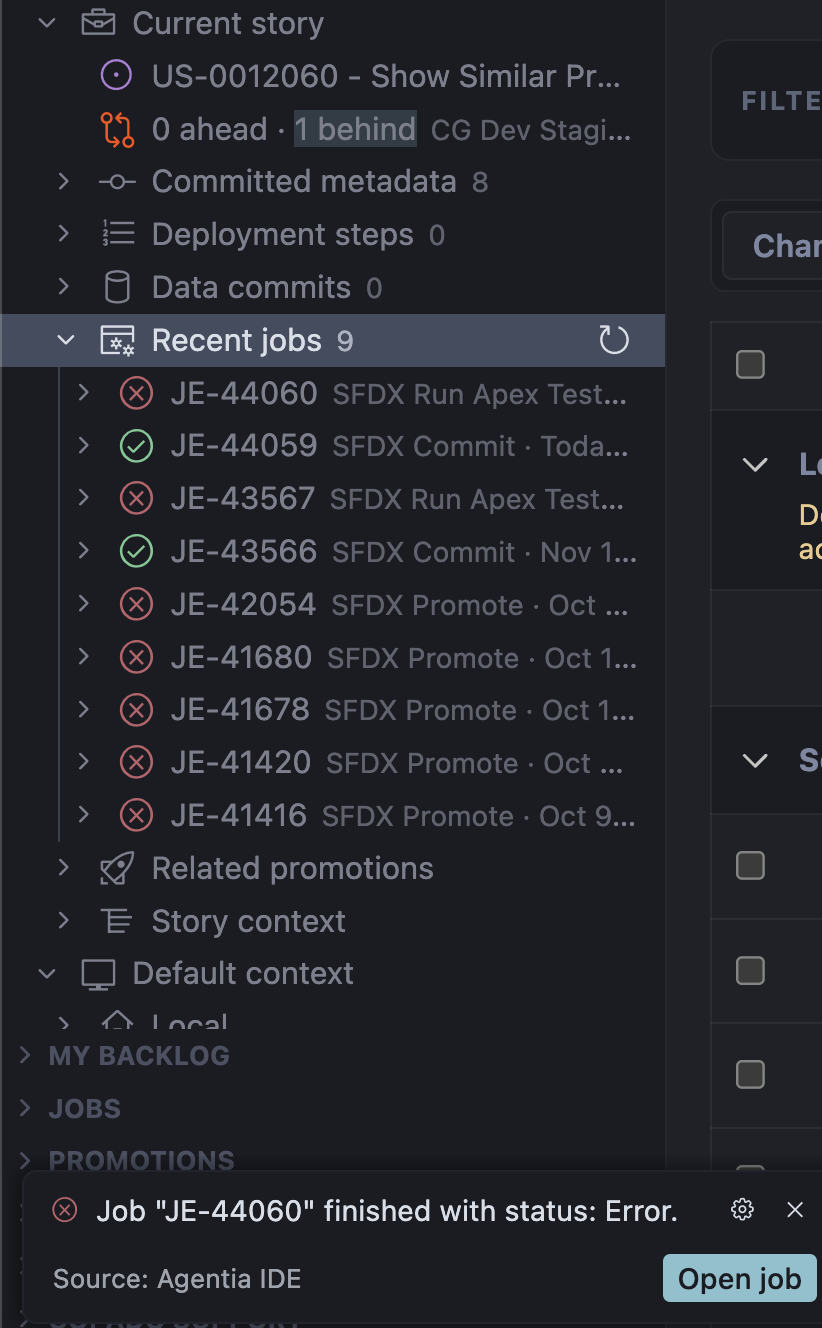
- Current → Recent jobs — the short list next to the story.
- Open job on the “commit started” notification — jumps straight to that execution.
| Success | Error |
|---|---|
 |  |
When the commit is healthy and you’re ready to move forward:
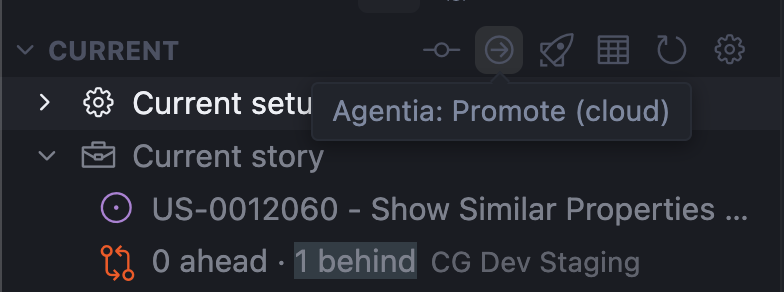
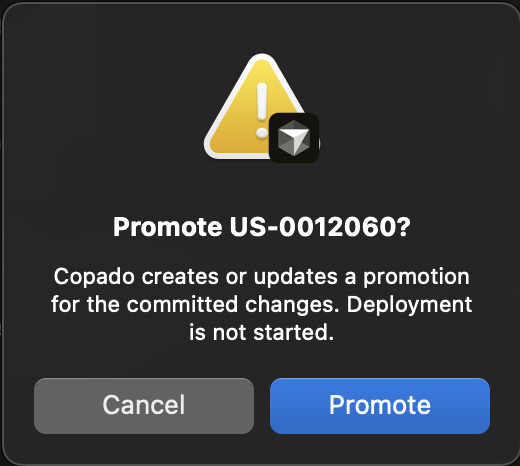
- Promote (cloud) — creates/advances the promotion after confirmation.
- Promote & Deploy (cloud) — same path with deploy.
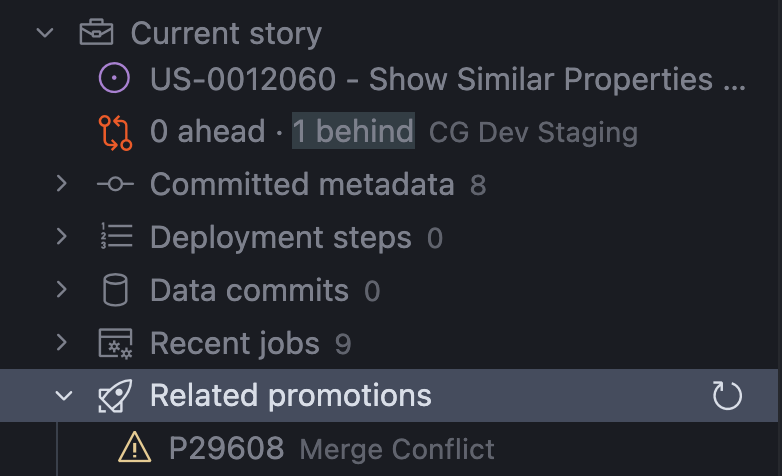
Those also start a job (and often a promotion). Follow them the same way: Recent jobs, Jobs, Open job, and the Promotions view when you care about promotion status rather than a single execution.
Takeaways
- Cloud is a middle ground. You use local IDE tooling and Copado governance without making day-to-day Git your job.
- Productivity comes from staying put. Select, compare, commit, and watch jobs in one place—less UI hopping, faster feedback.
- Setting the story as current unlocks the lane. It binds the story, seeds commit context, and starts local-change tracking.
- Git-first is still available. When your team is ready, switch the workspace to Local repository and keep the same IDE.
Next steps
- Set the workflow to Copado cloud and set a story as current. See Cloud Flow for the full path.
- Run one real commit from the panel (org change or local edit), then follow the job through to promote when you’re ready.
- When Git-first delivery becomes the team norm, switch the same workspace to the Local Flow—you’re already in the IDE habit.